In Part 1 of this blog post series, I explained how I recently spent some time getting various BSD OSes to run on QEMU, for 32-bit ARM (ARMv7). This part deals with FreeBSD.
Spoiler: it was easier than the others.
I started by downloading an image from https://download.freebsd.org/releases/arm/armv7/ISO-IMAGES/. Mine was called FreeBSD-14.1-RELEASE-arm-armv7-GENERICSD.img.xz.
Preparing UEFI
Warner Losh has thankfully written a blog post about how to get it running in QEMU, which we are going to follow.
In the post, he explains that QEMU contains a version of Tianocore EDK2 for 32-bit ARM. If you don’t know about Tianocore, it is a UEFI firmware – similar to the BIOS of a PC, except it’s not built in. It abstracts away the low-level hardware bits and presents a standardized interface to the user and the bootloader.
So let’s create two virtual flash devices – one read-only containing EDK2, one r/w for any UEFI variables that should be saved. The read-only one can be shared across VMs, for the other one you should have a copy per VM.
#!bin/sh

dd if=/dev/zero of=pflash0.img bs=1m count=64
dd if=/dev/zero of=pflash1.img bs=1m count=64
dd if=/opt/pkg/share/qemu/edk2-arm-code.fd of=pflash0.img conv=notrunc
dd if=/opt/pkg/share/qemu/edk2-arm-vars.fd of=pflash1.img conv=notrunc
Here, QEMU is installed through pkgsrc in /opt/pkg. If your installation is in a different directory, you may have to adjust the paths.
Creating the QEMU startup script
QEMU is fully configured through command-line options. Thus, the command lines are long and difficult to get just right. QEMU command lines are typically passed on from user to user, like a cargo cult. Here is mine for FreeBSD-ARM:
#!/bin/sh

qemu-system-arm \
	-M virt \
	-m 4096 \
	-drive file=pflash0.img,format=raw,if=pflash,readonly=on \
	-drive file=pflash1.img,format=raw,if=pflash \
	-drive file=FreeBSD-14.1-RELEASE-arm-armv7-GENERICSD.img,format=raw,if=virtio,cache=writethrough \
	-device virtio-net,netdev=net0,mac="52:54:00:12:34:55" \
	-netdev type=user,id=net0 \
	-device virtio-gpu-pci \
	-usb -device nec-usb-xhci \
	-device usb-kbd -device usb-mouse \
	-nographic
EFI wrangling
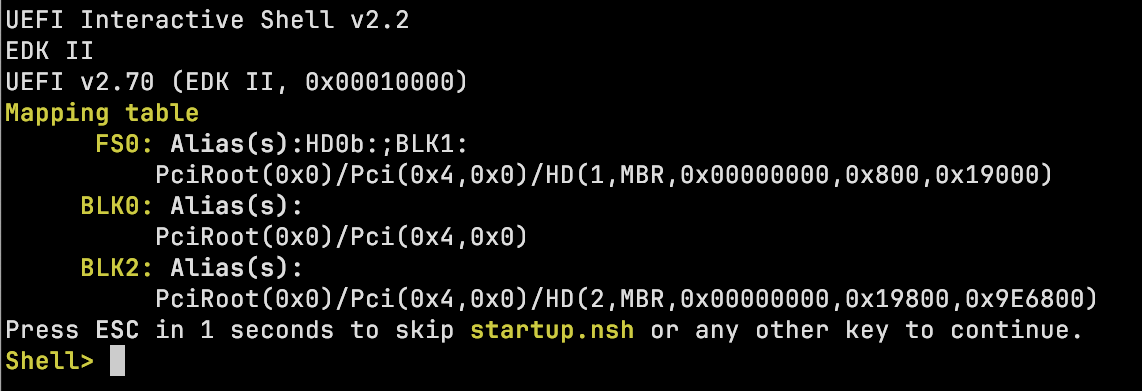
Upon launch, we get a UEFI shell prompt:

Welcome to the UEFI shell! Remember DOS?
The EFI shell (here is a primer from Intel) is strangely reminiscent of a DOS prompt. First, set the current device by typing
fs0:
You can now explore the contents with dir and change directories with cd. To boot, run this command:
EFI\boot\bootarm
To get this setting to stick in future reboots, create a startup.nsh file – the EFI equivalent to autoexec.bat – on the running system, as root:
echo 'fs0:\efi\boot\bootarm' > /boot/efi/startup.nsh
That’s it!
The FreeBSD/arm system from the image is immediately ready for action! No installation is needed. I was able to install some binary packages for armv7 simply by running
pkg update
pkg install python311 go123
All in all, this FreeBSD experience was about as frictionless as it gets, once you have cleared the hurdle of getting QEMU to run with the right settings.
You can quit the emulator and go back to the host shell by running halt -p as root.
In the next installment, we are going to install OpenBSD/armv7.